 |
| The Supply Pile |
When I set out to create a guest post of my
Halloween Felt Magnet Tutorial, hosted by the oh-so-crafty
Fire Wife Katie, I hit up
Michael's for some supplies for the tutorial, as well as for our class goody bags. I came home with a plan, and although it took me two weeks to complete everything that I had in mind for the holiday, I finished it ALL! This alone is a HUGE accomplishment for me! I usually start with a plan to do multiple items, and complete MAYBE one or two, usually the night before or the day of. This time, I completed everything by noon the day prior to our class party. The one thing that I hadn't completed already the weekend prior, was the
"Creepy Crayons".
I managed to put them off until I could no longer, then I just whipped them out! And they turned out awesome! Huge "Thanks!" to one of my Biggest Inspirations in Crafting, Tonya, for her awesome tutorial, and the idea to do these in the first place! It set the wheels in my head into motion, and helped me brainstorm a "No Sugar Added" Halloween Goody Bag that the kids could really enjoy. I wanted something homemade and original.
 |
| Wooden Magnets and Coloring Page Scrolls |
Wooden Painted Magnets
A simple painted wooden ornament, which I simply added a large button magnet to the back of, with my trusty E-6000...there were so many different spooky ornaments to choose from, and they were on clearance, so I bought a bunch, to make sure I would have enough for everyone to have one!
Coloring Page Scrolls
I bought a roll of coloring pages (also on clearance!), cut them apart, rolled them up like a scroll, and tied each one with a little decorative ribbon.
Felt Halloween Magnets
I created templates, cut everything out, glued the button magnets onto the backing pieces, and then bagged each set separately for our Mommy & Me Preschool class to do as a craft during our Halloween Party Class. I created one complete set as a Sample Set, for them to refer to. Because of the ages of the students (4-5 years), I tried to minimize the steps needed to complete the magnets, and all the children would need to do to create their very own magnet was glue the embellishment pieces onto a front piece, and then glue that to the backing piece, which already had the magnet attached. See My Tutorial! The felt sheets cost around 29 cents each, and I only ended up using one of each color, because I planned it out and traced all of the pieces onto each color before cutting, so I was able to eliminate waste and save money!
 |
Frankenstein Crayons
 |
Witch's Hat Crayons
 |
Candy Corn Crayons
 |
| Ghost Crayons |
|
|
|
|
|
|
Creepy Crayons
As mentioned above, I used Tonya's awesome tutorial for this one. Instead of using the candy molds and cookie molds, as originally intended, though, I used Halloween themed silicone molds. I had one that I had purchased last year after Halloween on clearance, and this past weekend, I came across the other two at Joann's, on clearance!
*Note: I have searched the web for the 3 pans I have, to link them, but have been unsuccessful in locating any listings for them, but have linked to a similar themed pan from Wilton.*
 |
Frankenstein Mold
 |
Ghost & Candy Corn Mold
 |
| Witch's Hat Mold |
|
|
Using the themed molds cut out having to pour the melted crayons from one container to another, which also meant I could toss multiple colors into the same mold, and it wouldn't all mix together into a funky and possibly BLAH color during the pouring process.
 |
| Peeled and partially broken crayon bits to be recycled into new crayons! |
Although I had purchased a handful of boxes of crayons to use, I found that I had plenty of old broken crayons that the kids had a blast tearing the paper off of, and breaking into smaller pieces for me. I let them cool in the molds overnight, and let the kids help me peel them out of the silicone pans that morning, and put them into the goody bags.
*Note: If you use my method, and toss multiple colors into the tins, do not panic when you take it out of the oven, and there is a solid odd color on top! I panicked a little, until I peeled them out, and they looked PERFECT on the front side...full of bright colors!*We had a great time playing fun games, crafting, and eating tons of yummy treats at our Potluck Halloween Party, and to be honest, the best part of all was putting my special treats into each of the goody bags the kids had decorated in class, along with all of the other wonderful treats everyone else had brought! I had some leftover goody bags, and plan to give them out to our trick-or-treaters!
*Wow, after reading this post, I realize JUST how many times I used the phrase "on clearance". Yes, I said it FOUR times...I really do love a great bargain, and what's NOT to love about the word CLEARANCE?
Read more...
Today, Katie is hosting MY guest post! I've created a fun Halloween Felt Magnet tutorial, and hope you will go check it out! While you are visiting me there, please feel free to check out some of Katie's great posts, and leave her some additional comment love!
Happy Crafting!
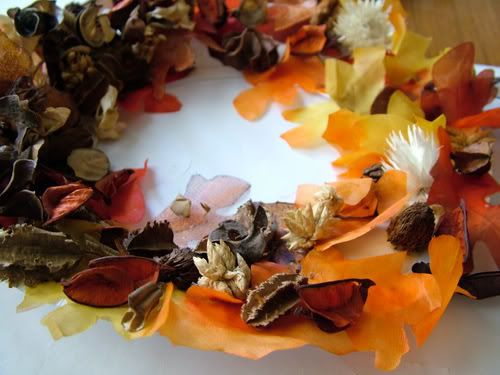
I am so excited to have my very first guest post today, and am extremely honored that she has chosen to share with us a wonderful Fall Wreath Tutorial! This is such a great craft, and is perfect for my very independent and artistic preschoolers!
Please welcome Katie, and show her some comment love! And please feel free to check out her blog at "Fire Wife Katie".
Thanks so much, Katie, for sharing your craft with us!
*********************************************************************
Hi, my name is Katie, I'm so happy to be guest posting over here today!
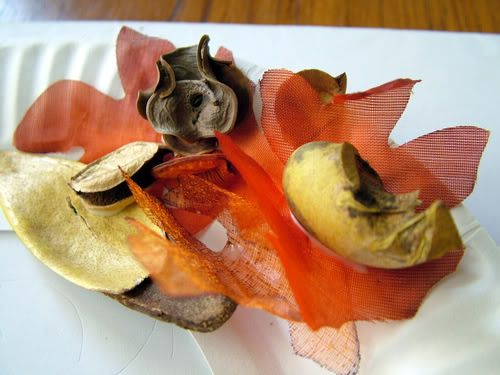
I want to share with you all this fabulous, simple craft that my children, aged 4 and 6, made the other day. These wreaths are made with potpourri so it smells fantastic, and it's a great way to involve the children in decorating for the season. The best part? These wreaths can be made with supplies from the dollar store!
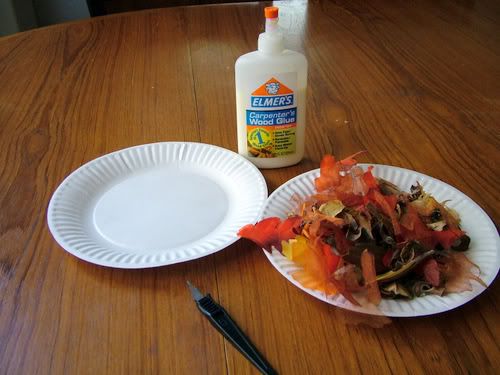
Here's what we used:
1 package of potpourri
Paper plates
Glue (any kind of liquid glue would work.)
Exact-o knife or scissors
Hole punch
Ribbon
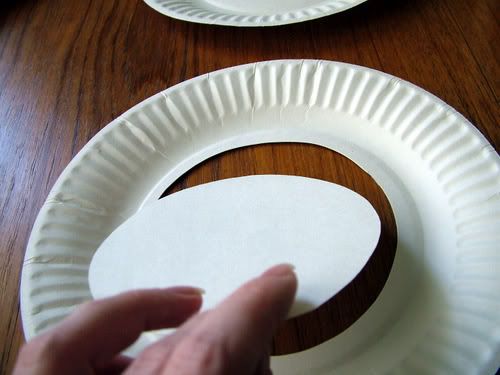
We began by cutting the middle out of the paper plates to form our wreaths.
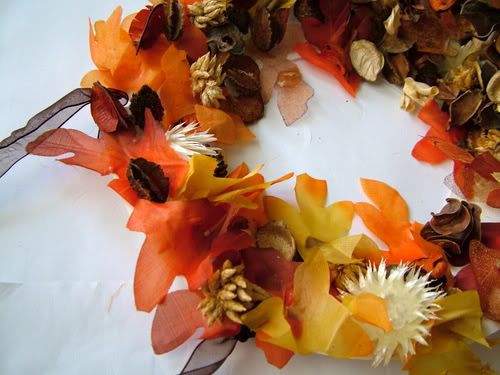
Then I placed a puddle of glue on a separate plate for each child to dip their bits of potpourri,
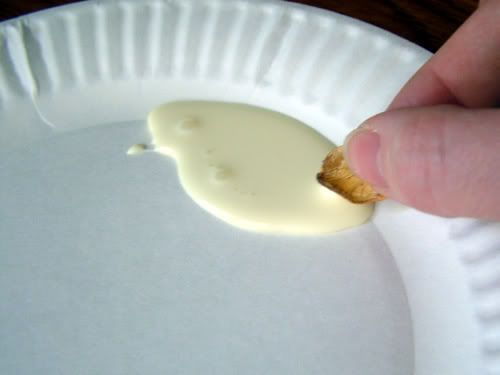
and glue at random to the plate.
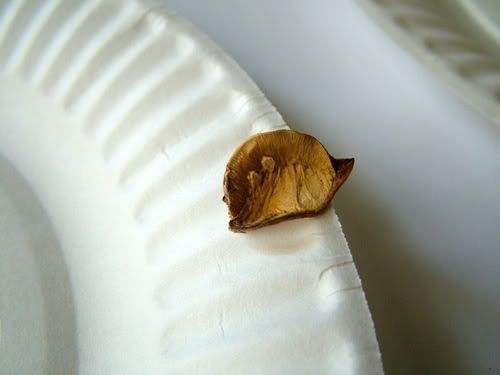
They had a lot of fun with this. I encouraged them to keep piling on the potpourri, layering one piece on top of another. They were giving up way too early. :)
I challenged them to cover every bit of white plate.
When they were finished, I let the plates dry overnight. The next day, I punched two holes in each plate and strung a ribbon to hang the wreaths.
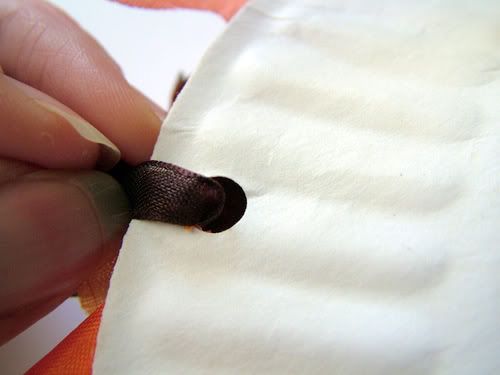
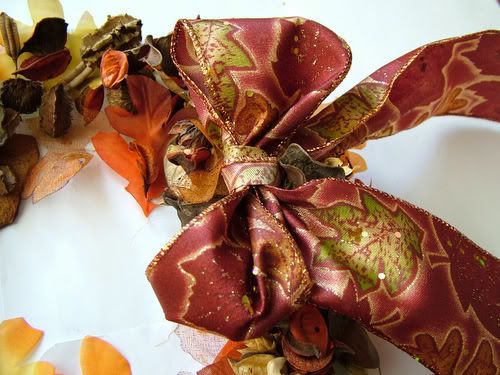
I also tied large decorative bows at the bottom of each one.
And that's it!
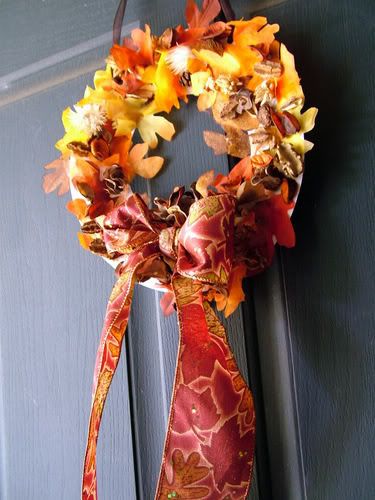
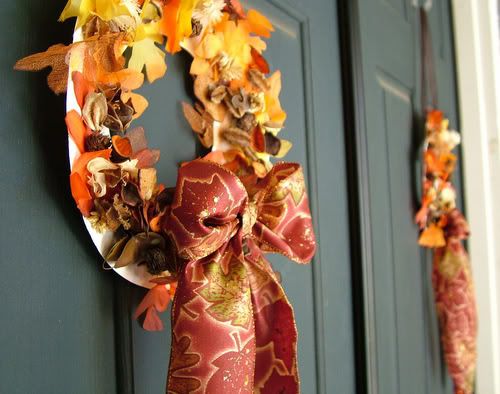
The children love that I hung these on our front doors. Every time they pass through, they feel so proud of their wreaths. And of course, as a mother, I love being able to proudly display something that they made!
--Fire Wife Katie
Read more...
 |
| Lego My Skeleton! |
When we arrived at Legoland today, Pickle was just starting to nap, and upon reaching the gate and telling him we were at our destination, he replied, "I hope they have beds here!" He stated that it was time for him to have his nap. (You know, the one he NEVER EVER takes, but suddenly, he needs when we have plans to have a fun time! Funny how that works, isn't it?)
Apparently, the napping is contagious! But, thankfully, it was short-lived. Once they saw the entrance, all thoughts of nap-time had vanished. Nothing but fun times ahead!
1st ride of the day: Fairytale Land! Boys in front, girls in back...Love how they balance the ride by having one adult in front and one in back, AND on opposing sides of the boat!
They were waving as we went by!
So she waved back!
Holding hands to the next stop...a sight that will never stop making my heart skip a beat and my breath catch in my throat...the 3 people that make my world go 'round.
There's so much more fun to share with you, but for now, this Momma needs to get her rest!
To Be Continued...
Read more...


